A SQL Server 2005 database is a collection of tables that store structured data. Each table in turn contains several types of objects that enforce attribute, entity and referential integrity such as constraints, triggers, default data, and user-defined functions. Tables also have Indexes to enable rows to be found quickly as well as Declarative Referential Integrity (DRI) constraints to ensure that interrelated data in different tables remain consistent. A SQL Server database also contains stored procedures that use T-SQL or .NET Framework programming code to perform operations on data.
An instance of SQL Server can have multiple databases. Each database can store either interrelated or unrelated data from other databases. For example, a SQL Server instance can contain a live database to support an e-commerce application and another reporting database with interrelated data from the first database to provide reporting functionality. There could also be a third database, historical database, to provide historical information on archived data.
From a SQL Server perspective, there are three types of databases:
These are the most common databases used in most applications. are optimal for managing changing data. They typically have several users (clients) who may use transactions at the same time to change data. OLTP databases typically have complex structures, contain lots of data, and represent the constantly changing state of an application's data (but without saving the history). E-commerce and trading applications typically use OLTP databases as the main back-end database.
The primary concern in OLTP databases is concurrency and atomicity. Concurrency controls in a database ensure that two users cannot change the same data at the same time, or that one user cannot change a piece of data before another user is finished changing/reading the data. Atomicity ensures that all steps in a transaction either ALL succeed or ALL fail (the most famous example is transferring money from one account to another).
In contrast to an OLTP database where the purpose is to capture high rates of data changes and additions, the purpose of a data warehouse it to organize lots of stable data for each of access and analysis. Data warehouses typically combine data from many heterogeneous data sources, organize data in simplified structures for efficiency of analytical queries, provide stable data that represent business history, and are updated regularly with additional data instead of making frequent transactions. Because users are not changing data, concurrency and atomicity issues are not a concern - data is changed only by periodic bull updates made during off-hours or low-traffic times.
Database snapshots are new in SQL Server 2005. A database snapshot is a read-only static-view of a source database. Snapshots are typically used for reporting purposes, but because a snapshot is transactionally consistent with the source database at the moment of the snapshot's creation, snapshots can be used to revert the source database to the state it was in when the snapshot was created.
Every SQL Server database has at least two files - a data file and a log file. Data files contain data and objects such as tables, indexes, stored procedures, etc. Log files on the other hand contain a log of all transactions and the database modifications made by each transaction.
Data files can be grouped together for administration and allocation purposes. SQL Server has three types of files as shown below:
| File Category | Description |
| Primary |
Contains start-up information and points to the other files in the database. Each database has only one primary file whose extension is .mdf. |
| Secondary |
These files are optional, are user-defined, and store user data. Secondary files are often used to spread data across multiple disks. Each database has zero or more secondary file whose extension is .ndf. |
| Transaction Log |
These files hold log information that is used to recover the database. Each database has at least one transaction log file whose extension is .ldf |
For single-disk systems, data and transaction files are places in the same location (same drive and same path). However, for production environment it is recommended that data and transaction log files be placed on separate disks.
Now that we know each database has data and log files, data files (primary and secondary) are usually contained inside a filegroup as follows:
| Filegroup | Description |
| Primary |
Every database has one primary filegroup containing the primary data file and all secondary data files that are not put into other filegroups. All system objects and table are allocated to the primary filegroup. The primary filegroup is also the default filegroup. This means that when objects are created in the database without specifying which filegroup they belong to, they will be assigned to the default filegroup. The default filegroup can be changed using the ALTER DATABASE statement. |
| User-defined | User-created file groups (as opposed to the primary group) can be created to group data files together for administrative or placement purposes. |
Consider the following example:
Secondary data files Data1.ndf, Data2.ndf, and Data3.ndf can be placed on three drives, respectively, and assigned to user-define filegroup FG1. A table can then be created explicitly on filegroup FG1. This means that queries for data from this table will spread across three disks, and hence improving performance.
Transaction logs record all transactions and database modifications made by each transaction. The transaction log is a critical part of any SQL Server database, and can be the only source of recent data is there was a system failure. The transaction log supports many operations, the most important are:
Recovery of individual transactions.
Recovery of all incomplete transactions when SQL Server started.
Supports transactional replication.
A database is always in one of the following states: ONLINE, OFFLINE, RESTORING, RECOVERING, RECOVERY PENDING, SUSPECT, EMERGENCY. The state of the database can be obtained with:
select name, state_desc from sys.databases
| name | state_desc |
| master | ONLINE |
| tempdb | ONLINE |
| model | ONLINE |
| msdb | ONLINE |
| AdventureWorksDW | ONLINE |
| AdventureWorks | ONLINE |
A database file is also always in one of the following states (note that file states are separate from database state): ONLINE, OFFLINE, RESTORING, RECOVERING, RECOVERY PENDING, SUSPECT, DEFUNCT. The state of files in a filegroup determines the availability of the whole filegroup. For a filegroup to be available, all files in that filegroup must be ONLINE. Use the following SQL to view the current state of a file or a filegroup:
select file_id, type, type_desc, data_space_id, name, physical_name, state_desc, size from sys.database_files -- To view state of a single file
| file_id | type | type_desc | data_space_id | name | physicla_name | state_desc | size |
| 1 | 0 | ROWS | 1 | AdventureWorks_Data | C:\Program Files\Microsoft SQL Server\MSSQL.1\MSSQL\Data\AdventureWorks_Data.mdf | ONLINE | 20984 |
| 2 | 1 | LOG | 0 | AdventureWorks_Log | C:\Program Files\Microsoft SQL Server\MSSQL.1\MSSQL\Data\AdventureWorks_Log.ldf | ONLINE | 256 |
| name | data_space_id | type | type_desc | is_default | is_read_only |
| PRIMARY | 1 | FG | ROWS_FILEGROUP | 1 | 0 |
SQL Server 2005 includes the following databases:
| System Database | Description |
| master |
Contains all system-level information for the current SQL Server 2005 instance. This includes metadata such as logon accounts, linked servers, and system configuration settings. The master database also contains information about all other databases and the location of their files. The master database also includes initialization information for SQL Server - this means that SQL Server cannot start if the master database is unavailable. When working with the master database, always consider having an up-to-date backup. Note that in SQL Server 2005, system objects are no longer stored in the master database. They are now stored in the Resource database. |
| Resource |
This is a read-only database that contains all system objects that are included with SQL Server 2005. The Resource database does not contain any user data or user metadata. In general, users cannot use or connect to the Resource database as the system objects within are only used within the SQL Server 2005 Database engine and are not for general use. |
| model |
Used as a template for all newly created databases. For example, when a database is created with CREATE DATABASE, the first part of the database is created by copying the content of the model database. The rest of the new database is filled with empty pages. Modifications made to model database will be applied to any database created afterwards. |
| msdb |
Used by SQL Server Agent for scheduling jobs and alerts. |
| tempdb |
A scratch workspace for holding temporary objects or immediate result sets. tempdb is always available to all users connected to the instance of SQL Server. tempdb is created every time SQL Server is started so that the system always starts with a clean copy of the tempdb database. Temporary tables and temporary stored procedures are automatically dropped on disconnect. This means that there is never anything in tempdb to be saved from one session of SQL Server to another. This also means that tempdb cannot be backed up or restored. |
It goes without saying that designing a databases requires the following two pre-requisites:
Full understanding of the business functions you want to model.
Full understanding of the database concepts and features that are required to mode these business functions.
Once business functions and database concepts are fully covered, designing a database involves addressing each of the following topics:
The following sections explain how to properly design a database with SQL Server 2005.
The next step is to create an initial database plan that serves both as a guide when implementing the database and as a functional specification for the database after it has been created (the database plan is an initial one because it will be revisited in the next step that follows.) Use the following steps when creating a database plan (regardless of size and complexity):
Gather information
You must have a good understanding of what the database is expected to perform
by fully understanding the business functionality the database is attempting
to model.
Identify the entities (tables)
Identify the key entities (tables) that will be managed by the database. The
entity can be a tangible thing such as a Customer or a Product, or it can be
an intangible thing such as a Trade or a Cash Flow. In general, there are
always a few primary or key entities, that once defined, are related entities
become visible. For example, in a financial trading system, the key entity is
the Trade. Entities relating to
Trade, while many and diverse, include
Product, Counterparty,
Security Flow, Cash Flow,
Collateral Flow, Settlement,
and much more.
Model the entities (tables)
After all (or most) entities have been identified, they should be recorded
down (i.e., documented) in a visual way. ERWin or Visio can be used to
properly model the database. Modelling the database includes the following two
steps:
Identify the attributes (columns) for each entity
Identifying the attributes (columns) is really about identifying the
types of information that must be stored for each entity. Columns in a
database table are typically divided into the following categories:
Raw data: These are tangible pieces of information such as name, address, etc.
Categorical: These columns are used to classify or group data. They are similar to an enum in C# and C++ which is a named set of constants such as Yes/No, Active/Cancelled/Stopped, etc.
Identifiers: These columns provide a mechanism to identify each row stored in a table. These columns typically correspond to the primary key.
Relationals: These columns are used to establish links
between parent/child tables.
Identify the relationships between entities
Identifying relations between tables in the design process requires
looking at tables, determine how they are logically related, and adding
relation columns to establish links between related tables.
Once an intial database plan has been created using the above step, the next step will be to revisit the plan and adjust it according to whether the database application is OLTP (Online Transaction Processing) or Decision Support (Data warehousing):
OLTP
Database plans for OLTP should be designed to promote
the following:
Good data placement
I/O bottlenecks is a big concern for OLTP databases. Determine the
likely data access pattern and combine frequently accessed data together.
Use filegroups and RAID to help in this.
Short transactions
User interactions (via GUI) should never ever run inside a transaction! When
possible run a single stored procedure to process the whole transaction. Put
references to frequently accessed tables at the end of the transaction to
minimize the duration that locks are held.
Online backup
OLTP are characterized by continuous operations in which down-time should be
kept to an absolute minimum. Schedule backup processes on a daily basis (SQL
Server can backup a database while it is being used).
High Normalization
Reduce redundant information to increase the speed of updates and improve
concurrency.
Minimal historical data
Data that is rarely accessed should be archived to a separate database, or
moved out of heavily updated tables into tables that contain only historical
data. This keeps tables as small as possible and improves back up times and
query performance.
Careful use of indexes
Avoid over-indexing heavily updated tables as indexes need to be updated
every time a row is added or modified.
Optimum hardware configuration
This allows the database to handle large numbers of concurrent users and
provide quick response times required by an OLTP system.
Data Warehousing
Database plans for Data Warehousing should be designed to
promote the following:
Heavy Indexing
Because decision support (data warehouses) databases have large volumes of
data with low update requirements, many indexes should be used to improve
query times.
Heavy denormalization
Introduce pre-aggregated or summarized data to satisfy common queries.
Use of star or snowflake schemas
Normalization was discussed in detail in the previous chapter. A normalized database typically has several narrow tables with fewer columns. A few wide tables with more columns is a characteristics of a denormalized database. Reasonable normalization frequently increases performance. Some of the benefits of normalization are:
Faster sorting and index creation.
A larger number of clustered index.
Narrower and more compact indexes.
Fewer indexes per table (this improves the performance of INSERT, UPDATE and DELETE.)
Fewer null values and less opportunity for inconsistency. This increases database compactness.
However, as normalization increases, the number and complexity of joins required to retrieve data also increases. Too many complex joins between too many tables can hinder performance. Sometimes it might be difficult to normalize (or even denormalize) a table without affecting applications. If the database is accessed through stored procedures, this normalization/denormalization can occur without affecting applications. If not, it might be possible to create a view that hides the schema changes from the applications.
Two important steps in designing databases are to identify valid values for each column, and to decide how to enforce the integrity of data in the column. Data Integrity was discussed in detail in the previous chapter. SQL Server helps ensure data integrity as follows:
Domain integrity: You can enforce domain integrity by
specifying a data type for each column, restrict the format using the
CHECK constraint, or restrict the range of
possible values by using FOREIGN KEY/CHECK/DEFAULT/NOT
NULL constraints.
Entity integrity: SQL Server can enforce entity integrity
via PRIMARY KEY/UNIQUE
constraints or IDENTITY properties
Referential integrity
You can enforce referential integrity in SQL Server 2005 by establishing
relationships between foreign keys and primary keys, or between foreign keys
and unique keys, through FOREIGN KEY and
CHECK constraints.
User-defined integrity
This allows you to define business rules that do not fall into one of the
integrity categories.
Extended properties are similar to C# attributes - extended properties are used to specify extra information that can be associated with any database object. For example, extended properties can specify information such as text (descriptive or instructional comment), input masks and formatting rules. Typical uses of extended properties include:
Specifying a caption for a table, column or view. Applications can use these captions in UI.
Specifying an input mask for a column so that applications can validate data before running T-SQL. For example, an application may retrieve an extended property for a PostCode column where this extended property specifies the required post-code format.
Specifying formatting rules for displaying data in a column.
Specifying textual description for the associated database object.
Specifying column location, read-only flags, friendly name and so on for each column.
Note: extended properties should never contain sensitive information about the associated object, as any user with a SELECT permission will be able to view the extended properties associated with that object.
So how do you define extended properties? and which database objects are allowed to have extended properties. First note that database objects in SQL Server 2005 are classified into three levels 0,1, and 2 when it comes to specifying extended properties:
Level 0 is the highest level and is defined as objects that are contained at the database scope. SCHEMA, TYPE, ASSEMBLY objects (and others ) are at level 0.
Level 1 objects are contained in a schema or user scope. A table is at level 1. TABLE, PROCEDURE, VIEW objects (and others ) are at level 1.
Level 2 objects are contained by level 1 objects. A columns is at level 2. COLUMN, CONSTRAINT, INDEX objects (and others) are at level 2.
Extended properties can be defined for objects of any of these levels. An extended property has a user-defined name and a value. Extended properties are added using sp_addextendedproperty stored proc as shown in the example below:
exec sp_addextendedproperty
@name = N'EP_Price', @value=N'Price
does not include VAT',
@level0type = N'SCHEMA', @level0name = 'Production'
@level1type = N'TABLE', @level1name = 'Product'
@level2type = N'COLUMN', @level2name = 'Price'
Adding an extended property to an object in one level must be qualified with the names of the higher level objects that own or contain the object to which an extended property is added. For example, in code above, because we want to add an extended property to a column (which is at level 2 - see MSDN documentation on sp_addextendedproperty), we have also to specify the level 1 containing object (a table) and the level 0 containing object (a schema) that contains the table.
The following example adds an extended property to PostalCode parameter of the AddUser stored procedure:
exec sp_addextendedproperty
@name = N'EP_PostalCode', @value=N'XXn
nXX',
@level0type = N'SCHEMA',
@level0name = 'Production'
@level1type = N'PROCEDURE', @level1name = 'AddUser'
@level2type = N'PARAMTER', @level2name =
'PostalCode'
You can view extended properties in in a couple ways as shown below:
select * from sys.extended_properties
select * from fn_listextendedproperty( default, default, default, default, default, default, default )
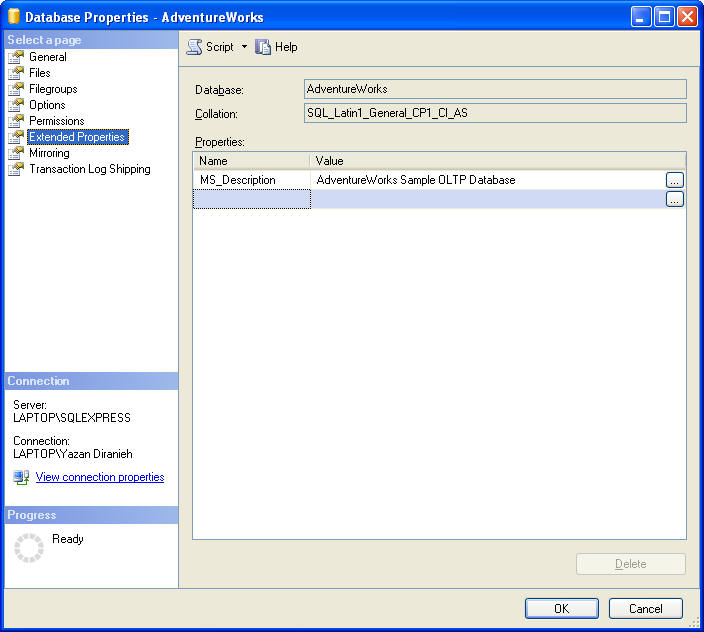
See MSDN for full documentation on sys.extended_properties and fn_listextentedproperty. You can also use Object Explorer to display properties for the active database:
Another important step in designing a database is database size! Estimating how large a database will be when filled with data can help you determine the best hardware configuration. The best hardware configuration for a database must achieve the following:
Achieve the requires application performance.
Guarantee the appropriate amount of disk space required to store data and indexes.
Estimating the size of the database can also help you determine whether the database design needs refining. For example, you may determine the database size is too large to implement and that more normalization is required.
In general, to estimate the size of a database, you need to estimate the size of each table individually and then add all values obtained. The size of table depends on whether it has indexes, and what kind of indexes it has.
To calculate table size:
Calculate the space required for the heap or clustered index.
Calculate the space required for the non-clustered index
Add steps 1 and 2.
To calculate clustered index size:
Calculate space required to store data in the leaf level of the clustered index.
Calculate space required to store index information.
Add steps 1 and 2.
To calculate non-clustered index size:
Calculate space required to store index information in the non-leaf levels of the non-clustered index.
Calculate space required to store index information in the leaf levels of the non-clustered index.
Add steps 1 and 2.
Please refer to Estimating the Size of a Database in MSDN full details on how to calculate a the size of a database.
As was mentioned previously in Files and Filegroups, every database has at least two files - a data file and a log file. Data files contain data and objects such as tables, indexes, stored procedures, etc. Log files on the other hand contain a log of all transactions and the database modifications made by each transaction. Filegroups are named collections of data files and are used to achieve the following:
Files and filegroups can improve performance considerably because it lets a database be created across multiple disks, multiple disk controllers, or RAID systems. For example, if you have 3 hard disks, you can create a database made up of 2 data files and one log file, with one file on each disk. As data is accessed, three read/write heads can access the data in parallel at the same time, hence the increase in database performance.
Files and filegroups can simplify data placement because a table can be created in a specific filegroup. This improves performance because all I/O for a specific table can be directed at a specific disk. For example, a heavily accessed table can be placed in one data file in one filegroup located on disk A, while other less heavily accessed tables in the database can be put in other files in other filegroups on disk B.
When multiple filegroups are used, the files in a database can be backed up and restored individually. For example, only the file/filegroup on the failed disk has to be restored. Files and filegroups in SQL Server 2005 allow a database to be restored in stages in a process known as piecemeal restore. See Performing Piecemeal Restores in MSDN for full details.
Files and filegroups must follow these the following rules:
Transaction log files (*.ldf) are never part of any filegroup. In other words, filegroups only contain data files.
A file can be a member of one filegroup only.
A file or filegroup cannot be used by more than one database.
The following points are recommended when working with files and filegroups:
For most databases, a single data file and a single transaction log file will suffice. This single data file is created automatically and is referred to as the primary data file. It contains system tables and objects. The primary data file is automatically placed in the primary filegroup which is the default filegroup.
When creating multiple data files, create a second filegroup and place all additional data files (known as secondary data files) in this filegroup and make this filegroup the default filegroup. In this way, the primary file will contain only system tables and objects.
To maximize performance, create files/filegroups on each available local physical disks. Put objects that compete heavily for space in different filegroups.
Put different tables that are often used in join queries in different filegroups (hence different disks as per recommendation # 3). This improves performance because of parallel disk I/O searching for joined data.
Put heavily accessed tables and their associated non-clustered indexes in different filegroups. Again this improves performance because of parallel disk I/O searching for data.
Do not put the transaction log file or files on the same physical disk that has the other files/filegroups.
When creating a database, make the data files as large as possible based on the maximum amount of data you expect in the database. Permit the database to grow automatically, but place a limit on growth by specifying a maximum data file growth size that leaves some space on the disk (otherwise, data files grow as much as required until the disk becomes full). Data file growth size is specified when the database is created with CREATE DATABASE statement.
For tables that should not be modified, i.e., read only, they should placed in a filegroup that is marked as read-only. Read-only file groups can be specified with ALTER DATABASE statement.
Now that we know how to design a database, the next step would be to show examples of how to create and alter databases. However, creating/altering databases often requires knowledge of SQL Server metadata such as the following:
Names and locations of files/filegroups in a database.
Names and number of tables/views in a database.
Constraints that are defines on a table.
Indexes and keys that are defined for a table.
The following sections discuss issues relating to querying and viewing metadata.
In previous versions of SQL Server, metadata for all objects in a database are visible to members of the public role. This means that any user that is logged on to SQL Server can view metadata for every object in the database, even those objects on which the user had no specific permissions. In SQL Server 2005, the visibility of metadata is limited to objects that the user either owns or has been granted specific permissions. For example, whether the following SQL returns any results or not depends on which permissions have been granted:
select * from sys.tables where name = 'MyTable';
This limited metadata accessibility means that queries on system views might return a subset of rows or sometimes no results at all. To allow users to access metadata, you can grant callers the VIEW DEFINITION permission at an appropriate scope: server, database, schema, or object. While VIEW DEFINITION grants users access to metadata, it does not allow access to the securable object itself. For example, user that is granted only VIEW DEFINITION on a table can see metadata related to that table in the sys.objects catalog, but without addition permissions the user can read data from the table.
The following shows how to grant VIEW DEFINITION permission at different levels:
-- Server level
grant view any definition to yazan
-- Database level
grant view definition to yazan
-- Schema level
grant view definition on schema :: AdventureWorks to yazan
-- Object level
grant view definition on object :: Person.Address to yazan
Note that some metadata must be accessible to all users in a specific database. For example, filegroups do not have conferrable permissions. The following are some of the catalog views that are visible to the public role: sys.filegroups, sys.schemas, sys.partitions, sys.configurations, etc.
The rules for viewing T-SQL source code for database objects are stricter than viewing metadata. To see a T-SQL text definition of an object, a user must either own the object or have been granted one of the following permissions:
VIEW DEFINITION
CONTROL
ALTER
TAKE OWNERSHIP
For example, assume a user was granted the EXECUTE permission on stored procedure spMyProc. When the user attempts to view the definition of spMyProc in by querying sys.sql_modules catalog view, the definition column will have a null value simply because the user does not have the appropriate permissions. Once the user has been granted one of the 4 permissions above, the user will be able to see the T-SQL definition of spMyProc in the definition column of sys.sql_modules.
For example, to view all stored procedure definitions in AdventureWorks database:
select * from sys.sql_modules
Information in System Catalogs can be accessed in the following ways:
Catalog Views (recommended)
Catalog Views is a new relational interface to SQL Server metadata. These
views provide access to metadata that is stored in every database. Catalog
views are recommended because they are the most efficient way of accessing
server metadata, they represent metadata in a format that is independent of
any catalog table implementation and hence are not affected by changes to the
underlying catalog tables, and more importantly, all metadata is made
available as catalog views. Note that some catalog views inherit rows from
other catalog views. For example, sys.tables
inherits from sys.objects, this means that
sys.tables has columns that are specific to tables
and also all the columns that below to sys.objects.
Below are some of the most common catalog views:
select * from sys.databases
-- returns a row per database in the instance of SQL
Server
select * from sys.master_files
-- returns a row per file of a database as stored in the
master database
select * from sys.databse_files
-- returns a row per file of a database as stored in
database itself
select * from sys.extended_properties
-- returns a row for each extended property in the
database
select * from sys.tables
-- returns a row for each table object
select * from sys.columns
-- returns a row for each column of an object that has
columns such as view or tables
select * from sys.indexes
-- returns a row for each index or heap of a tabular
object such as a table, view or table-valued function
select * from sys.sql_modules
-- returns a row for each object that is a SQL
language-defined module
etc.
Information Schema Views
Information Schema Views are based on Catalog Views in the SQL-92 standard.
Applications that use Information Schema Views are portable between heterogeneous SQL-92
compliant database systems. Note that Information Schema Views do not
contain metadata specific to SQL Server 2005. Information schema views are
defined in a special schema called INFORMATION_SCHEMA
which is contained in each database. Each information schema views contains
metadata for all data objects stored in a particular database.
Below are some examples:
select * from
AdventureWorks.INFORMATION_SCHEMA.COLUMNS
select * from AdventureWorks.INFORMATION_SCHEMA.TABLES
select * from
AdventureWorks.INFORMATION_SCHEMA.REFERENTIAL_CONSTRAINTS
etc.
System Stored Procedures and Functions
T-SQL defines system stored procedures and functions to return catalog
information. Although these stored procedures and functions are specific to
SQL Server 2005, they insulate users from the structure of the
underlying system catalog tables.
Below are some examples of system stored procedures followed by system
functions
-- System stored
procedures
exec sp_columns where @table_name = 'Department'
-- similar to sys.columns but for a specific table
exec sp_databases
-- similar to sys.databases but sys.databases returns more
information
exec sp_stored_procedures
-- System functions
select * from DB_ID()
-- Get ID of current database
select object_id('AdventureWorks.HumanResources.Department')
-- Get ID of a specific object
OLE DB Schema Rowsets / ODBC Catalog Functions
These define standard interfaces for presenting catalog information that is
supported by different OLE DB/ODBC drivers.
You can view database, file, partition, and filegroups using a variety of catalog views, system functions, and system stored procedures. The related views, functions and stored procedures are shown below:
| Views | Functions | Stored Procedures |
| sys.databases sys.database_files sys.data_spaces sys.filegroups sys.allocation_units sys.master_files sys.partitions sys.partition_functions sys.partition_parameters sys.partiion_range_values sys.partiion_schemes sys.dm_db_partition_stats |
DATABASE_PRINCIPAL_ID DATABASE_PROPERY_EX DB_ID DB_NAME FILE_ID FILE_IDEX FILE_NAME FILEGROUP_ID FILEGROUP_NAME FILEGROUPPROPERTY FILEPROPERTY fn_virtualfilestats |
sp_databases sp_helpdb sp_helpfile sp_helpfilegroup sp_spaceused DBCC_SQLPREF |
Note: Most tasks that relate to creating and modifying databases are accomplished with CREATE DATABASE and ALTER DATABASE statements.
Before creating a database, you should consider the following:
You must determine the name of the databases, its owner, its size, and the file and filegroups used to store it.
Files and filegroups can be created when the database is created, or created later when more files are added to the database. You cannot move files between filegroups once files have been added to the database.
You must have CREATE DATABASE, CREATE ANY DATABASE, or ALTER ANY DATABASE permissions.
The following sections are covered:
-- Drop database if it
already exists. Note use of the db_id() system function to check the existence
of a database by name
if db_id('MyTest') IS NOT NULL
drop database MyTest
-- Create the MyTest database with all the default options
create database MyTest
-- View information about the database files (results
shown in first table below). Note that because all defaults have been
-- used, the size of the primary database file is the size of the model primary
database file. Also because maxsize was not
-- specified, the data files will grow until the disk is full
select file_id, data_space_id, name, physical_name, state_desc, size, max_size, growth from
sys.master_files where name like 'MyTest%'
-- View information on filegroups (results shown in second
table below). Note that there is
already a filegroup for the primary file. In fact, it is an error
to explicitly associate a filegroup with the primary data file
select * from sys.filegroups
|
file_id |
data_space_id |
name |
physical_name |
state_desc |
size |
max_size |
growth |
|
1 |
1 |
MyTest |
c:\Program Files\Microsoft SQL Server\MSSQL.1\MSSQL\DATA\MyTest.mdf |
ONLINE |
152 |
-1 |
128 |
|
2 |
0 |
MyTest_log |
c:\Program Files\Microsoft SQL Server\MSSQL.1\MSSQL\DATA\MyTest_log.LDF |
ONLINE |
63 |
268435456 |
10 |
| name | data_space_id | type | type_desc | is_default | filegroup_guid | log_filegroup_id | is_read_only |
|
PRIMARY |
1 |
FG |
ROWS_FILEGROUP |
1 |
NULL |
NULL |
0 |
-- Drop database if it
already exists. Note use of the db_id() system function
...
-- Create a database with the specified data and
transaction log files. Note
also that the default for
-- sizes is MB
create database MyTest
on ( name = MyTest_data, filename = 'c:\ ...
\MyTest_data.mdf', size = 10, maxsize = 50 )
log on ( name = MyTest_log, filename = 'c:\ ... \MyTest_data.ldf', size =
10, maxsize = 50 );
-- View information about the database files
select file_id, data_space_id, name, physical_name, state_desc, size, max_size, growth from
sys.master_files where name like 'MyTest%'
-- View information on filegroups. Note that the specified
data file is the primary data file and that a filegroup has
-- been created for it (this filegroup is the primary filegroup)
select * from sys.filegroups
| file_id | data_space_id | name | physical_name | state_desc | size | max_size | Growth |
|
1 |
1 |
MyTest_data |
c:\Program Files\Microsoft SQL Server\MSSQL.1\MSSQL\DATA\MyTest_data.mdf |
ONLINE |
1280 |
6400 |
128 |
|
2 |
0 |
MyTest_log |
c:\Program Files\Microsoft SQL Server\MSSQL.1\MSSQL\DATA\MyTest_data.ldf |
ONLINE |
1280 |
6400 |
10 |
| name | data_space_id | type | type_desc | is_default | filegroup_guid | log_filegroup_id | is_read_only |
|
PRIMARY |
1 |
FG |
ROWS_FILEGROUP |
1 |
NULL |
NULL |
0 |
-- Drop database if it
already exists. Note use of the db_id() system function
...
-- Create a database with the specified data and log files
and filegroup. You cannot specify a filegroup on the
-- primary data file.
create database MyTest
on
( name = MyTest_data, filename = 'c:\..\MyTest_data.mdf', size = 10,
maxsize = 50 ),
filegroup SecondaryGroup ( name = MyTest_data2, filename =
'c:\..\MyTest_data2.mdf', size = 10, maxsize = 50 )
log on
( name = MyTest_log, filename = 'c:\..\MyTest_data.ldf', size
= 10, maxsize = 50 )
-- View information about the database files
select file_id, data_space_id, name, physical_name, state_desc, size, max_size, growth from
sys.master_files where name like 'MyTest%'
-- View information on filegroups. Note that the first
data file is the primary data file ( a primary filegroups has already
-- been created for this file). The second data file (data_space_id = 2) has the
SecondaryGroup filegroup as requested
select * from sys.filegroups
| file_id | data_space_id | name | physical_name | state_desc | size | max_size | growth |
|
1 |
1 |
MyTest_data |
c:\Program Files\Microsoft SQL Server\MSSQL.1\MSSQL\DATA\MyTest_data.mdf |
ONLINE |
1280 |
6400 |
128 |
|
2 |
0 |
MyTest_log |
c:\Program Files\Microsoft SQL Server\MSSQL.1\MSSQL\DATA\MyTest_data.ldf |
ONLINE |
1280 |
6400 |
10 |
|
3 |
2 |
MyTest_data2 |
c:\Program Files\Microsoft SQL Server\MSSQL.1\MSSQL\DATA\MyTest_data2.mdf |
ONLINE |
1280 |
6400 |
128 |
| name | data_space_id | type | type_desc | is_default | filegroup_guid | log_filegroup_id | is_read_only |
|
PRIMARY |
1 |
FG |
ROWS_FILEGROUP |
1 |
NULL |
NULL |
0 |
|
SecondaryGroup |
2 |
FG |
ROWS_FILEGROUP |
0 |
51D130FE-5854-4706-BCD7-144070EDB438 |
NULL |
0 |
-- Alter MyTest database by adding a new data
file.
alter database MyTest
Add file (name = MyTest_data3, filename = 'c:\Program Files\Microsoft SQL
Server\MSSQL.1\MSSQL\Data\MyTest_data3.mdf', size = 10, maxsize = 50 )
-- View information about the database files
select file_id, data_space_id, name, physical_name, state_desc, size, max_size, growth from
sys.master_files where name like 'MyTest%'
-- View information on filegroups. Note that the data file
has been added to the primary filegroup (data_space_id = 1) since we
-- did not explicitly specify which filegroup the new data file should go to
select * from sys.filegroups
| file_id | data_space_id | name | physical_name | state_desc | size | max_size | growth |
|
1 |
1 |
MyTest_data |
c:\Program Files\Microsoft SQL Server\MSSQL.1\MSSQL\Data\MyTest_data.mdf |
ONLINE |
1280 |
6400 |
128 |
|
2 |
0 |
MyTest_log |
c:\Program Files\Microsoft SQL Server\MSSQL.1\MSSQL\Data\MyTest_data.ldf |
ONLINE |
1280 |
6400 |
10 |
|
3 |
2 |
MyTest_data2 |
c:\Program Files\Microsoft SQL Server\MSSQL.1\MSSQL\Data\MyTest_data2.mdf |
ONLINE |
1280 |
6400 |
128 |
|
4 |
1 |
MyTest_data3 |
c:\Program Files\Microsoft SQL Server\MSSQL.1\MSSQL\Data\MyTest_data3.mdf |
ONLINE |
1280 |
6400 |
128 |
| name | data_space_id | type | type_desc | is_default | filegroup_guid | log_filegroup_id | is_read_only |
|
PRIMARY |
1 |
FG |
ROWS_FILEGROUP |
1 |
NULL |
NULL |
0 |
|
SecondaryGroup |
2 |
FG |
ROWS_FILEGROUP |
0 |
51D130FE-5854-4706-BCD7-144070EDB438 |
NULL |
0 |
See MSDN documentation under ALTER DATABASE for more examples.
Finally, you can use the CREATE DATABASE statement to create a read-only static-view database called a database snapshot. The snapshot is of an existing database called the source database. You can also create a read-only database that can be distributed through removable media such as CD-ROM (i.e., for historical or archival databases), but by using the sp_create_removable stored procedure. After the database has been created, you can use sp_certify_removable system stored procedure to ensure that the database is configured correctly for distribution on removable media.
This section presents a quick overview of other database modification operations. Refer to MSDN for full details
SQL Server automatically expands a database according to growth parameters defined when the database was created. You can also manually expand the database by allocating additional file space on existing data files, or by adding more data files. You can increase the size of the database using either SQL Server Management Studio (Object Explorer → Databases → Database Properties → Files ) or via ALTER DATABASE statement (ALTER DATABASE database_name MODIFY FILE <filespec>).
In SQL Server, each file within a database can be reduced to remove unused pages. Both data and transaction files may be shrunk. Database files can be shrunk manually or the database can be set to shrink automatically at specified intervals. The following table shows what options are available to shrink a database:
| Option | Procedure |
| Automatic database shrinking |
ALTER DATABASE AdventureWorks SET AUTO_SHRINK ON |
| Manual database shrinking | DBCC SHRINKDATABASE |
| Manual database file shrinking | DBCC SHRINKFILE |
All of the above can also be achieved from SQL Server Management Studio.
Several database-level options determine the characteristics of the database. These options are at the database level and do not affect other databases. These options are set to their default value when a database is created. You can modify database options using ALTER DATABASE SET <optionspec> statement.
Data and transaction log files can be detaches and reattached to the same or another SQL Server instance. Detaching and reattaching can be useful if you want to move the database to a different SQL Server instance or to move database files to completely different locations. The following table shows what options are available to detach/reattach a database:
| Option | Procedure |
| Detaching a database | sp_detach_sp or SQL Server Management Studio |
| Attaching a database |
CREATE DATABASE database_name <filespec> FOR ATTACH or SQL Server Management Studio |
You can move system and user-defined database files, except the Resource database file by specifying the new file location in ALTER DATABASE statement.
Again, a database may be renamed via ALTER DATABASE statement.
You can delete a user-defined database when it is no longer needed, or if it is moved to another database server. You cannot delete a system database. When a user-defined database is deleted, the files and their data are deleted from the disk. Deleting a database is permanent and cannot be undone unless through a previous backup. It is always a good idea to backup the master database after deleting a database, because deleting a database updates rows in the master database. A database can be deleted with DROP DATABASE statement.
In addition to correct database design, good database performance is achieved with hardware-based solutions, partitions, and tempdb optimizations.
The I/O subsystem, or storage engine, is a key component of any relational database. A successful database implementation requires careful planning at the early stages of the project, and the storage engine (I/O subsystem) requires most of this planning. For example:
What type of disk hardware to use, such as RAID.
How to use files and filegroups to organize data.
How to design indexes to improve query performance.
How to set all database configuration parameters correctly so that the database can perform well.
Partitioning a database improves performance and simplifies maintenance. By splitting a large table into smaller individual tables, queries needing to access only a fraction of the data can run much faster as there is less data to scan. Maintenance tasks such as rebuilding an index or running backups also run more quickly. Partitioning can be achieved via hardware, horizontal partitions, and vertical partitioning:
Partitioning can be achieved without splitting tables by physically placing them on individual disk drives. Putting a table on one physical drive and its related tables on a separate drive, for example, can improve query performance, because queries involving joins between these tables can utilize multiple disk heads that run at the same time. SQL Server files and filegroups can be used to specify on which disk to put the tables.
Horizontal partitioning divides a table into multiple tables each containing the same set of columns but fewer rows. For example, a [Sales] tables that contains millions of rows, can be divided into 12 tables, with each smaller table representing data for a specific month. Determining how to horizontally partition a table depends on how data is analyzed. You should partition tables so that queries reference as few tables as possible. Otherwise excessive UNION queries can affect performance. In SQL Server 2005, horizontal partitioning can be achieved with Views and Partitioned Views.
Vertical partitioning divides a table into multiple tables each containing the same set of rows but fewer columns. There are two types of vertical partitioning:
Normalization
Normalization is the standard database process of removing redundant columns
from a table and putting them in child tables linked to the primary table via
primary and foreign keys.
Row Splitting
Row splitting divides the original table vertically into tables with fewer
columns. Row n in a split table matches row n in the other tables.
For example, joining the 6th row from each split table creates the
original row.
Like horizontal partitioning, vertical partitioning can increase performance. For example, a table containing 20 columns of which only the first 5 are generally referenced, will definitely benefit from splitting the second half into a separate table. Vertical partitioning should be considered carefully, as accessing data from multiple partitions requires joining the tables which could affect performance.
The size of the tempdb database can affect user-defined database performance. General recommendations for physical placement and database options set for the tempdb database include the following:
Permit the tempdb database to automatically grow as required. This ensures that queries that generate large unexpected intermediate result sets stored in the tempdb database are not terminated before the operation is completed.
Set the original size of the tempdb database files to a reasonable size to avoid the files from automatically expanding as more space is required.
Set the file growth increment percentage to a reasonable value to avoid the tempdb database files from growing by too small a value.
Put the tempdb database on a fast I/O subsystem. Put the tempdb database on disks that are different from those used by user databases.